Managing Certificates
The Operator expects consumers to leverage a thirdparty tool to generate TLS certificates that can be wired in to KurrentDB deployments using secrets. The sections below describe how certificates can be generated using popular vendors.
Certificate Manager (cert-manager)
Prerequisites
Before following the instructions in this section, these requirements should be met:
- cert-manager is installed
- You have the required permissions to create/manage new resources on the Kubernetes cluster
- The following CLI tools are installed and configured to interact with your Kubernetes cluster. This means the tool must be accessible from your shell's
$PATH, and your$KUBECONFIGenvironment variable must point to the correct Kubernetes configuration file:
Using trusted certificates via LetsEncrypt
To use self-signed certficates with KurrentDB, follow these steps:
- Create a LetsEncrypt Issuer
- Future certificates should be created using the
letsencryptissuer
LetsEncrypt Issuer
The following example shows how a LetsEncrypt issuer can be deployed that leverages AWS Route53:
apiVersion: cert-manager.io/v1
kind: ClusterIssuer
metadata:
  name: letsencrypt
spec:
  acme:
    privateKeySecretRef:
      name: letsencrypt-issuer-key
    email: { email }
    preferredChain: ""
    server: https://acme-v02.api.letsencrypt.org/directory
    solvers:
      - dns01:
          route53:
            region: { region }
            hostedZoneID: { hostedZoneId }
            accessKeyID: { accessKeyId }
            secretAccessKeySecretRef:
              name: aws-route53-credentials
              key: secretAccessKey
        selector:
          dnsZones:
            - { domain }
            - "*.{ domain }"
This can be deployed using the following steps:
- Replace the variables
{...}with the appropriate values - Copy the YAML snippet above to a file called
issuer.yaml - Run the following command:
kubectl -n kurrent apply -f issuer.yamlUsing Self-Signed certificates
To use self-signed certficates with KurrentDB, follow these steps:
- Create a Self-Signed Issuer
- Create a Self-Signed Certificate Authority
- Create a Self-Signed Certificate Authority Issuer
- Future certificates should be created using the
ca-issuerissuer
Self-Signed Issuer
The following example shows how a self-signed issuer can be deployed:
apiVersion: cert-manager.io/v1
kind: ClusterIssuer
metadata:
  name: selfsigned-issuer
spec:
  selfSigned: {}
This can be deployed using the following steps:
- Copy the YAML snippet above to a file called
issuer.yaml - Run the following command:
kubectl -n kurrent apply -f issuer.yamlSelf-Signed Certificate Authority
The following example shows how a self-signed certificate authority can be generated once a self-signed issuer has been deployed:
apiVersion: cert-manager.io/v1
kind: Certificate
metadata:
  name: selfsigned-ca
spec:
  isCA: true
  commonName: ca
  subject:
    organizations:
      - Kurrent
    organizationalUnits:
      - Cloud
  secretName: ca-tls
  privateKey:
    algorithm: RSA
    encoding: PKCS1
    size: 2048
  issuerRef:
    name: selfsigned-issuer
    kind: ClusterIssuer
    group: cert-manager.io
Note
The values for subject should be changed to reflect what you require.
This can be deployed using the following steps:
- Copy the YAML snippet above to a file called
ca.yaml - Ensure that the
kurrentnamespace has been created - Run the following command:
kubectl -n kurrent apply -f ca.yamlSelf-Signed Certificate Authority Issuer
The following example shows how a self-signed certificate authority issuer can be generated once a CA certificate has been created:
apiVersion: cert-manager.io/v1
kind: Issuer
metadata:
  name: ca-issuer
spec:
  ca:
    secretName: ca-tls
This can be deployed using the following steps:
- Copy the YAML snippet above to a file called
ca-issuer.yaml - Ensure that the
kurrentnamespace has been created - Run the following command:
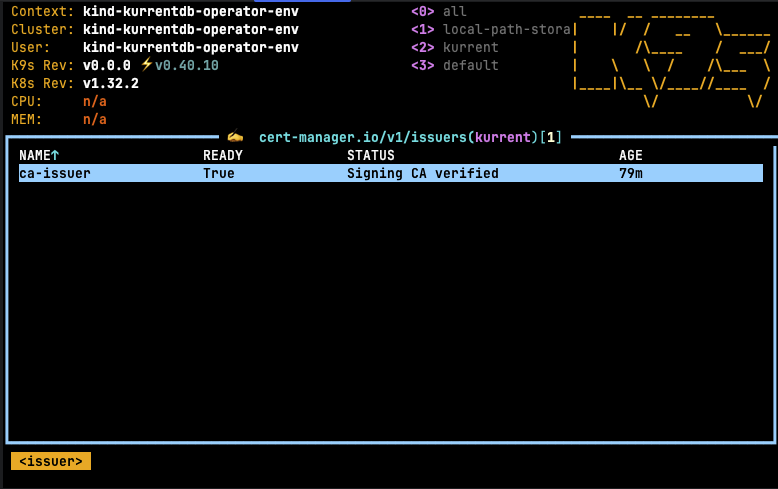
kubectl -n kurrent apply -f ca-issuer.yamlOnce this step is complete, future certificates can be generated using the self-signed certificate authority. Using k9s, the following issuers should be visible in the kurrent namespace:

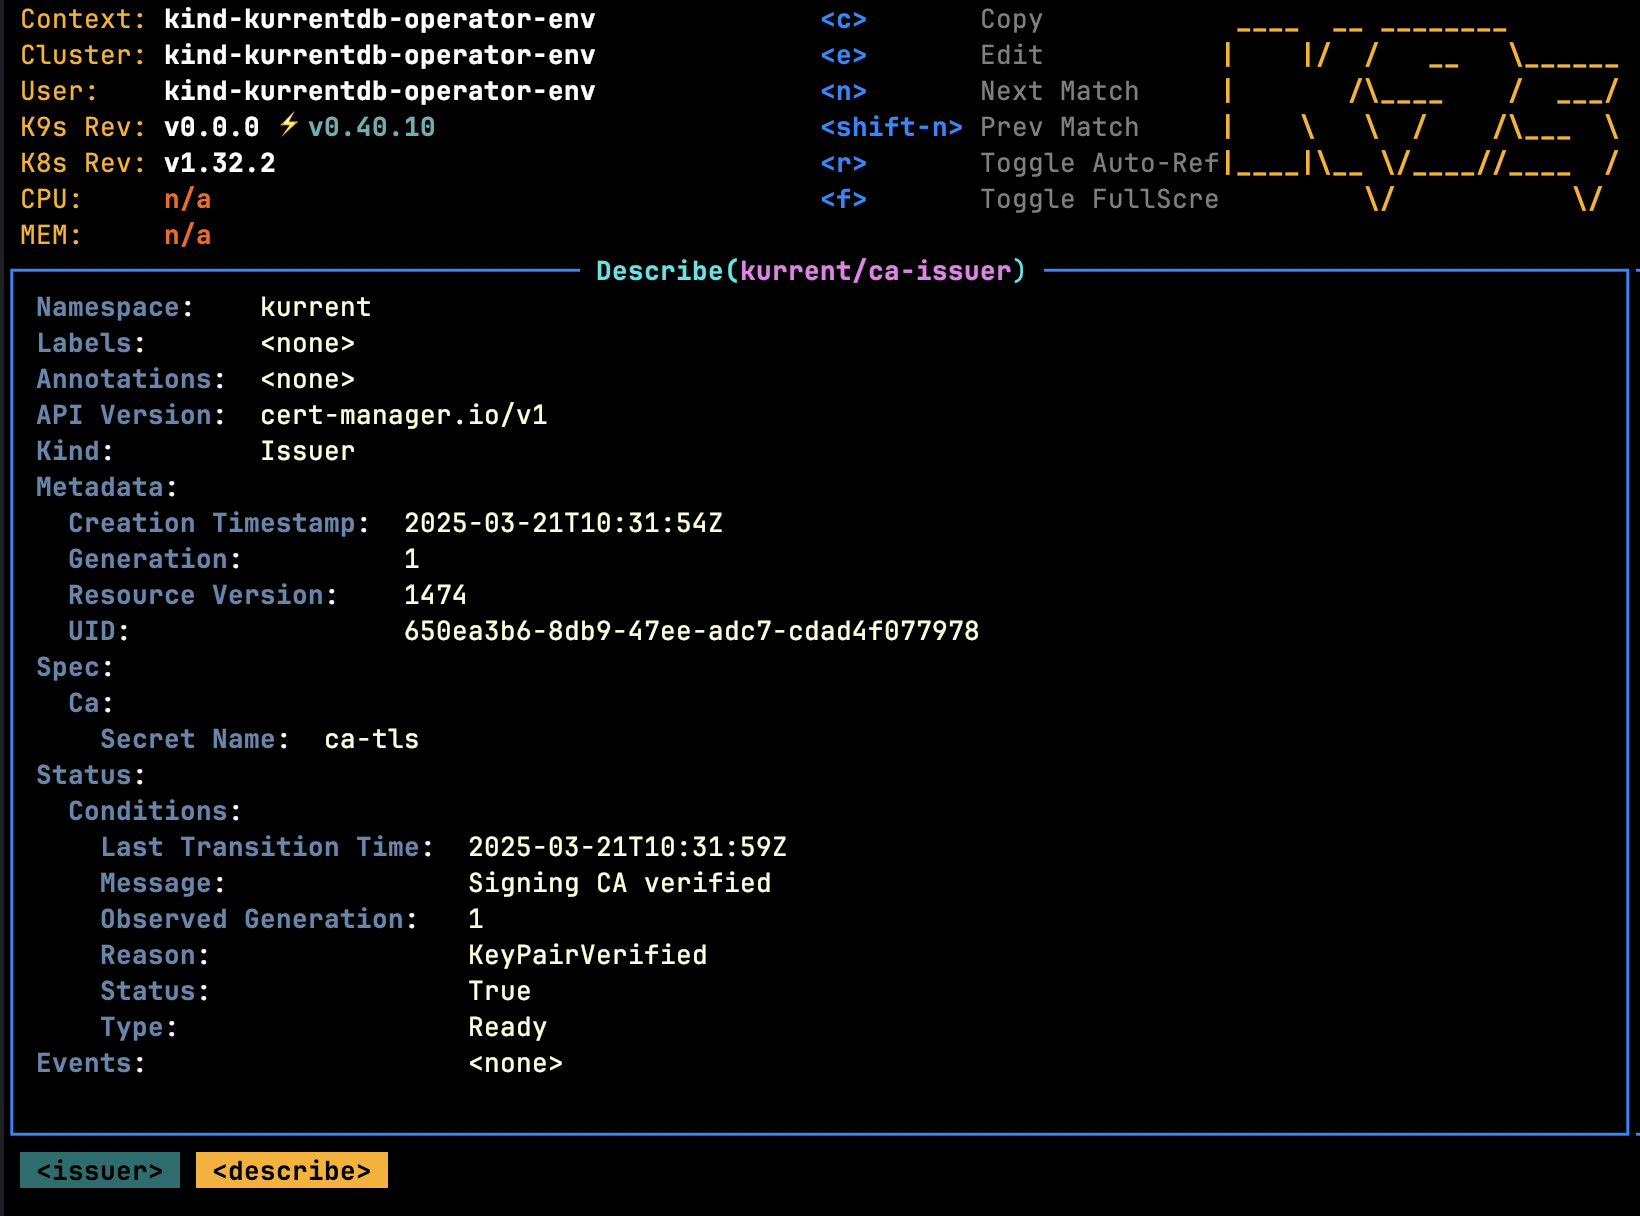
Describing the issuer should yield:
